---
title: "Environment Variables"
description: "Read how to configure environment variables for self-hosted Infisical."
---
Infisical accepts all configurations via environment variables. For a minimal self-hosted instance, at least `ENCRYPTION_KEY`, `AUTH_SECRET`, `DB_CONNECTION_URI` and `REDIS_URL` must be defined.
However, you can configure additional settings to activate more features as needed.
## General platform
Used to configure platform-specific security and operational settings
Must be a random 16 byte hex string. Can be generated with `openssl rand -hex
16`
Must be a random 32 byte base64 string. Can be generated with `openssl rand
-base64 32`
Must be an absolute URL including the protocol (e.g.
https://app.infisical.com).
Specifies the internal port on which the application listens.
Specifies the network interface Infisical will bind to when accepting incoming connections.
By default, Infisical binds to `localhost`, which restricts access to connections from the same machine.
To make the application accessible externally (e.g., for self-hosted deployments), set this to `0.0.0.0`, which tells the server to listen on all network interfaces.
Example values:
- `localhost` (default, same as `127.0.0.1`)
- `0.0.0.0` (all interfaces, accessible externally)
- `192.168.1.100` (specific interface IP)
Telemetry helps us improve Infisical but if you want to disable it you may set
this to `false`.
Determines whether App Connections and Dynamic Secrets are permitted to
connect with internal/private IP addresses.
Determines whether your Infisical instance can automatically read the service
account token of the pod it's running on. Used for features such as the IRSA
auth method.
Disable storing audit logs in the database. This is useful if you're using
audit log streams and don't want to store them in the database.
## CORS
Cross-Origin Resource Sharing (CORS) is a security feature that allows web applications running on one domain to access resources from another domain.
The following environment variables can be used to configure the Infisical Rest API to allow or restrict access to resources from different origins.
Specify a list of origins that are allowed to access the Infisical API.
An example value would be `CORS_ALLOWED_ORIGINS=["https://example.com"]`.
Defaults to the same value as your `SITE_URL` environment variable.
Array of HTTP methods allowed for CORS requests.
Defaults to reflecting the headers specified in the request's Access-Control-Request-Headers header.
## Data Layer
The platform utilizes Postgres to persist all of its data and Redis for caching and backgroud tasks
### PostgreSQL
Please note that the database user you create must be granted all privileges
on the Infisical database. This includes the ability to create new schemas,
create, update, delete, modify tables and indexes, etc.
Postgres database connection string.
Configure the SSL certificate for securing a Postgres connection by first encoding it in base64.
Use the following command to encode your certificate: `echo "" | base64`
Many cloud providers provide a CA certificate for their data regions that you can use to secure your connection with SSL.
If you're hosting your database on AWS RDS, you can use their publicly available CA certificate as the database root certificate.
You can find all the available CA certificates for AWS RDS on the official [AWS RDS documentation](https://docs.aws.amazon.com/AmazonRDS/latest/UserGuide/UsingWithRDS.SSL.html).
As an example, if your RDS cluster is hosted in `us-east-1` _(US East, N. Virginia)_, you can use the following root certificate: https://truststore.pki.rds.amazonaws.com/us-east-1/us-east-1-bundle.pem.
All the available CA certificates can be found in the AWS RDS documentation linked above.
Remember to base64 encode the certificate before setting it as the `DB_ROOT_CERT` environment variable. `cat /path/to/certificate.pem | base64`.
```bash
DB_ROOT_CERT=LS0tLS1CRUdJTiBDRVJUSUZJQ0FURS0tLS0tCk1 # .... (base64 encoded certificate)
DB_CONNECTION_URI=?sslmode=verify-ca # or verify-full depending on your security policies
```
Postgres database read replica connection strings. It accepts a JSON string.
```
DB_READ_REPLICAS=[{"DB_CONNECTION_URI":""}]
```
Postgres read replica connection string.
Configure the SSL certificate for securing a Postgres replica connection by first encoding it in base64.
Use the following command to encode your certificate: `echo "" | base64`
If not provided it will use master SSL certificate.
### Redis
Redis is used for caching and background tasks. You can use either a standalone Redis instance or a Redis Sentinel setup.
Redis connection string.
Comma-separated list of Sentinel host:port pairs. ```
192.168.65.254:26379,192.168.65.254:26380 ```
The name of the Redis master set monitored by Sentinel
Whether to use TLS/SSL for Redis Sentinel connection
Authentication username for Redis Sentinel
Authentication password for Redis Sentinel
Authentication username for Redis Node
Authentication password for Redis Node
Comma-separated list of Redis Cluster host:port pairs. ```
192.168.65.254:26379,192.168.65.254:26380 ```
Enable Redis TLS encryption on connection.
Enable this if you are using AWS encrypt on transit for Elasticache cluster. For more information refer .
Authentication username for Redis Node
Authentication password for Redis Node
Comma-separated list of Redis read replicas host:port pairs. ```
192.168.65.254:26379,192.168.65.254:26380 ```
The paramters like username, password, tls, redis type of the primary instance will be inherited.
## Email Service
Without email configuration, Infisical's core functions like sign-up/login and secret operations work, but this disables multi-factor authentication, email invites for projects, alerts for suspicious logins, and all other email-dependent features.
Hostname to connect to for establishing SMTP connections
Port to connect to for establishing SMTP connections
Credential to connect to host (e.g. team@infisical.com)
Credential to connect to host
Email address to be used for sending emails
Name label to be used in From field (e.g. Team)
If this is `true` and `SMTP_PORT` is not 465 then TLS is not used even if the
server supports STARTTLS extension.
If this is `true` and `SMTP_PORT` is not 465 then Infisical tries to use
STARTTLS even if the server does not advertise support for it. If the
connection can not be encrypted then message is not sent.
If this is `true`, Infisical will validate the server's SSL/TLS certificate
and reject the connection if the certificate is invalid or not trusted. If set
to `false`, the client will accept the server's certificate regardless of its
validity, which can be useful in development or testing environments but is
not recommended for production use.
If your SMTP server uses a certificate signed by a custom Certificate Authority, you should set this variable so that Infisical can trust the custom CA.
This variable **must be a base64 encoded PEM certificate**. Use the following command to encode your certificate: `echo "" | base64`
Infisical highly encourages the following variables be used alongside this one for maximum security:
- `SMTP_REQUIRE_TLS=true`
- `SMTP_TLS_REJECT_UNAUTHORIZED=true`
1. Create an account and configure [SendGrid](https://sendgrid.com) to send emails.
2. Create a SendGrid API Key under Settings > [API Keys](https://app.sendgrid.com/settings/api_keys)
3. Set a name for your API Key, we recommend using "Infisical," and select the "Restricted Key" option. You will need to enable the "Mail Send" permission as shown below:


4. With the API Key, you can now set your SMTP environment variables:
```
SMTP_HOST=smtp.sendgrid.net
SMTP_USERNAME=apikey
SMTP_PASSWORD=SG.rqFsfjxYPiqE1lqZTgD_lz7x8IVLx # your SendGrid API Key from step above
SMTP_PORT=587
SMTP_FROM_ADDRESS=hey@example.com # your email address being used to send out emails
SMTP_FROM_NAME=Infisical
```
Remember that you will need to restart Infisical for this to work properly.
1. Create an account and configure [Mailgun](https://www.mailgun.com) to send emails.
2. Obtain your Mailgun credentials in Sending > Overview > SMTP

3. With your Mailgun credentials, you can now set up your SMTP environment variables:
```
SMTP_HOST=smtp.mailgun.org # obtained from credentials page
SMTP_USERNAME=postmaster@example.mailgun.org # obtained from credentials page
SMTP_PASSWORD=password # obtained from credentials page
SMTP_PORT=587
SMTP_FROM_ADDRESS=hey@example.com # your email address being used to send out emails
SMTP_FROM_NAME=Infisical
```
This will be used to verify the email you are sending from.

If you AWS SES is under sandbox mode, you will only be able to send emails to verified identies.
Create an IAM user for SMTP authentication and obtain SMTP credentials in SMTP settings > Create SMTP credentials


With your AWS SES SMTP credentials, you can now set up your SMTP environment variables for your Infisical instance.
```
SMTP_HOST=email-smtp.ap-northeast-1.amazonaws.com # SMTP endpoint obtained from SMTP settings
SMTP_USERNAME=xxx # your SMTP username
SMTP_PASSWORD=xxx # your SMTP password
SMTP_PORT=465
SMTP_FROM_ADDRESS=hey@example.com # your email address being used to send out emails
SMTP_FROM_NAME=Infisical
```
Remember that you will need to restart Infisical for this to work properly.
1. Create an account and configure [SocketLabs](https://www.socketlabs.com/) to send emails.
2. From the dashboard, navigate to SMTP Credentials > SMTP & APIs > SMTP Credentials to obtain your SocketLabs SMTP credentials.
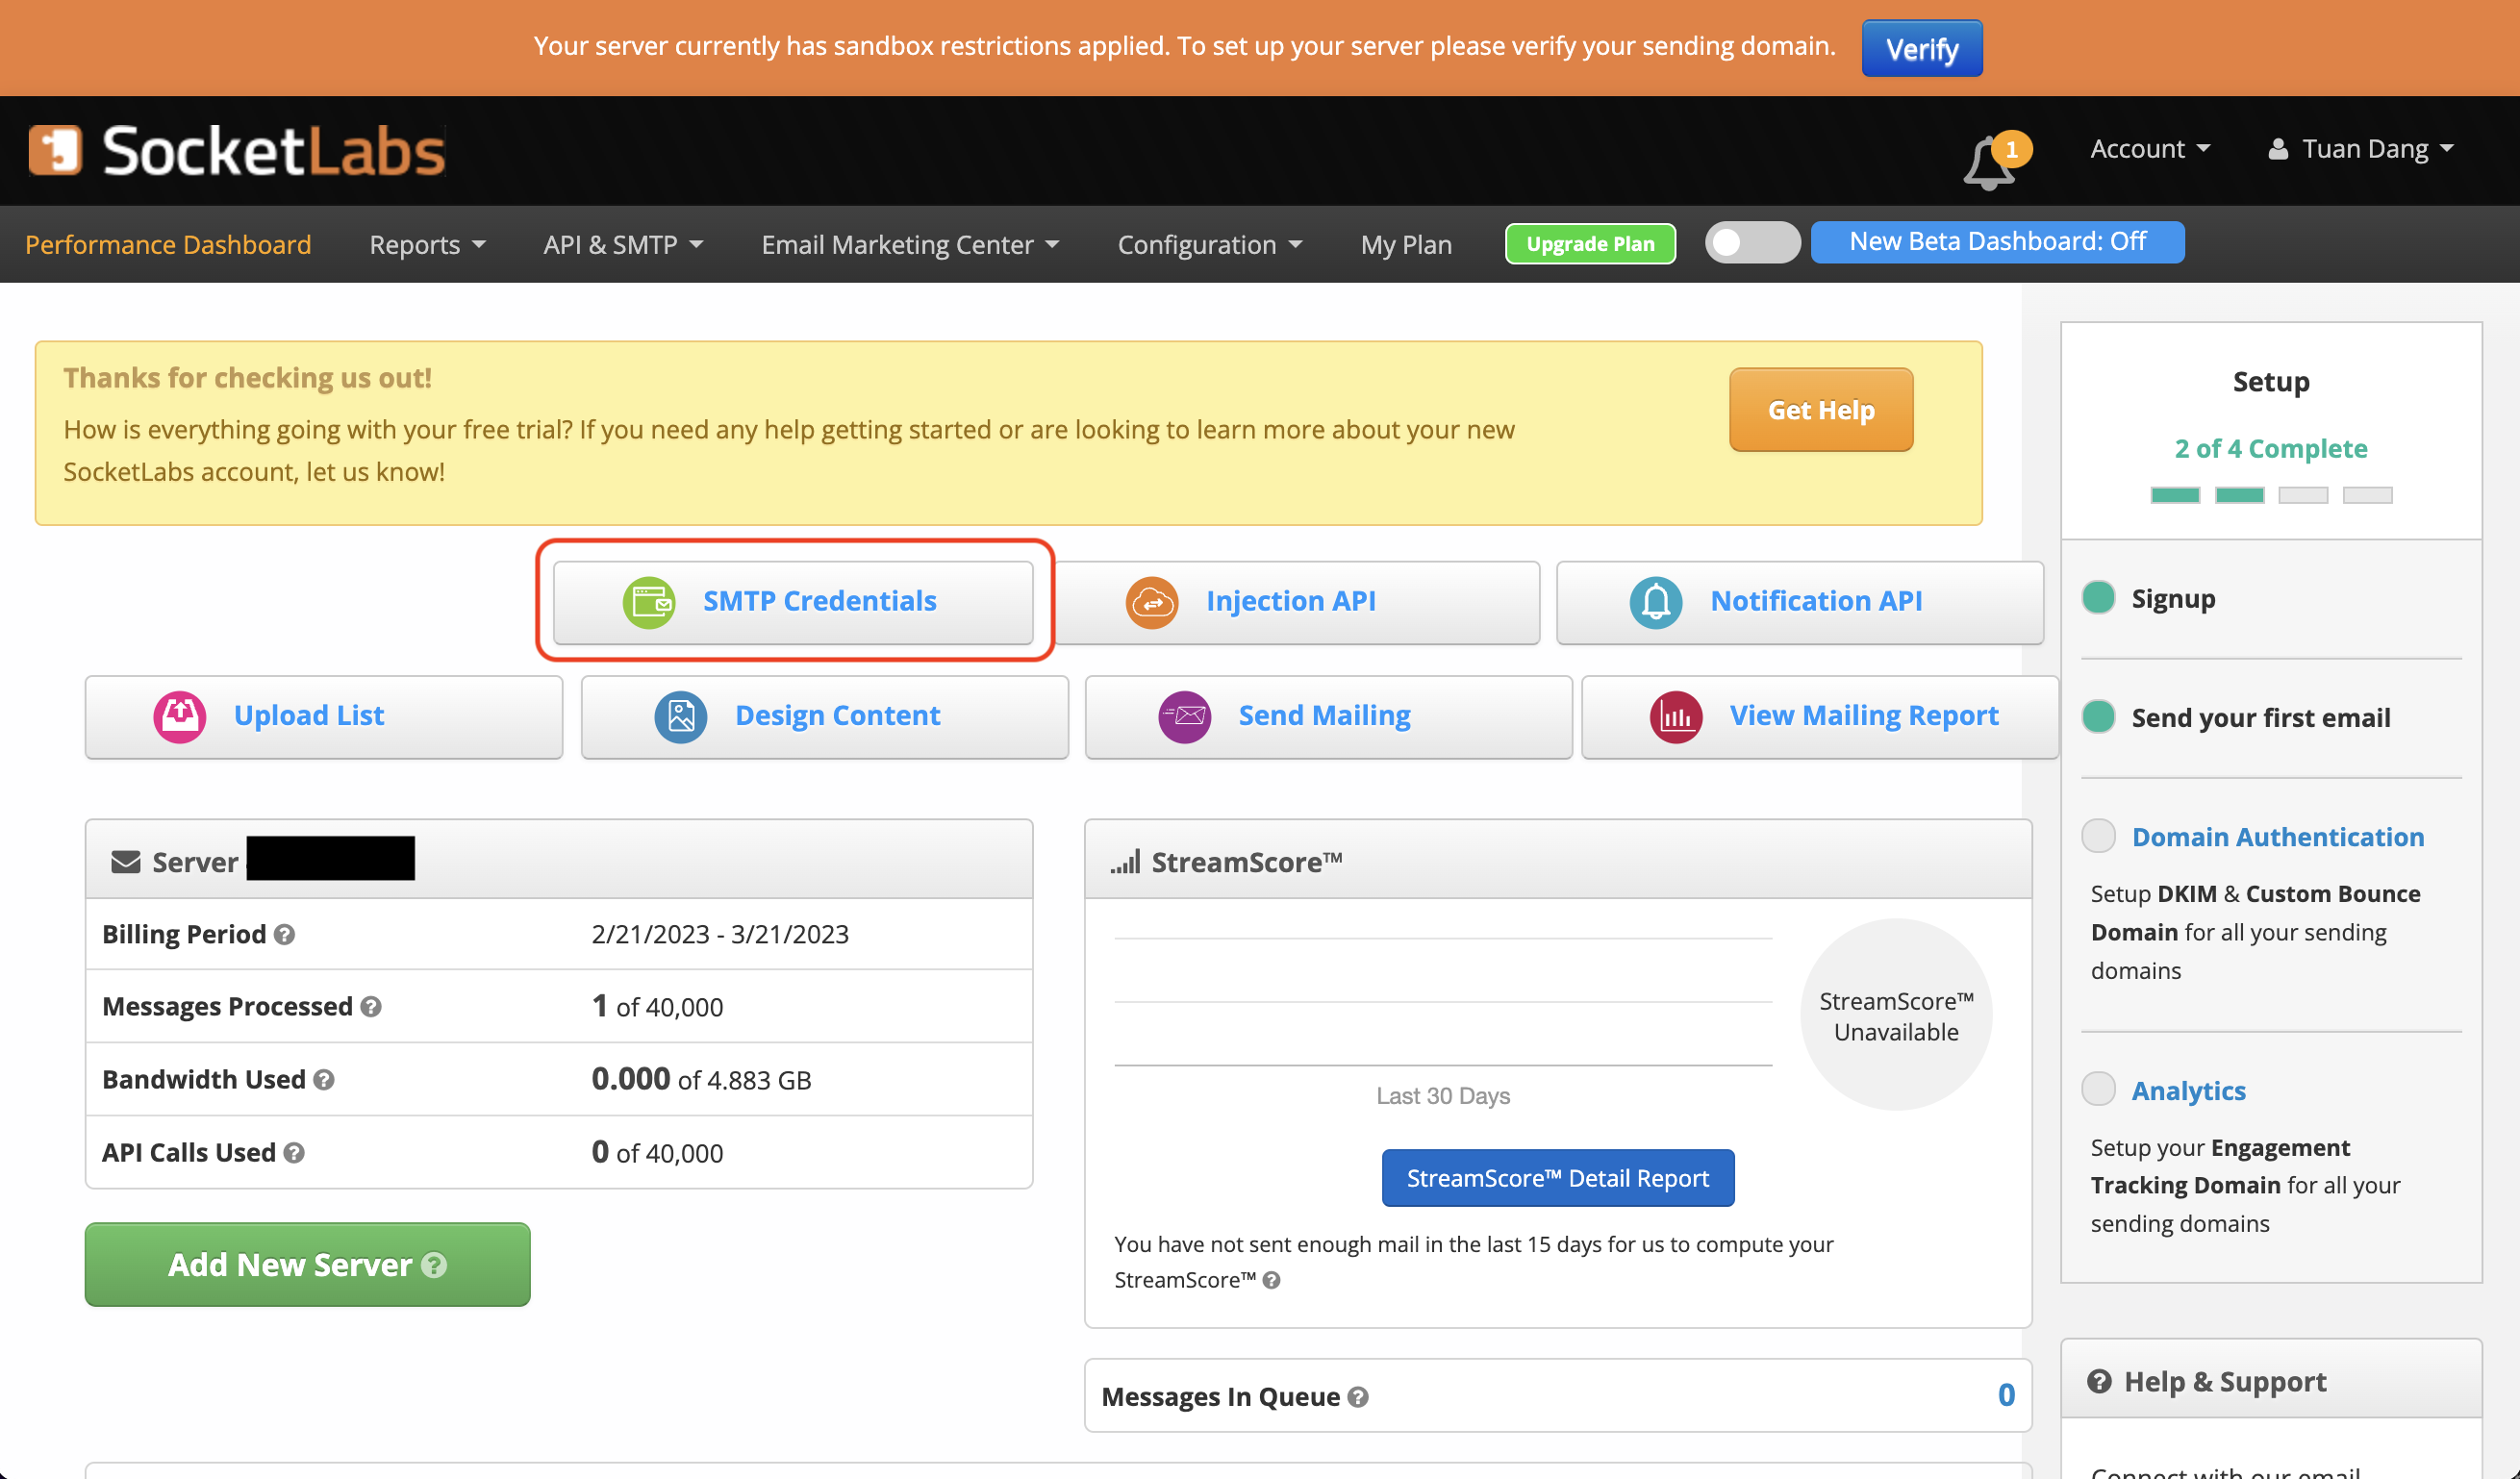
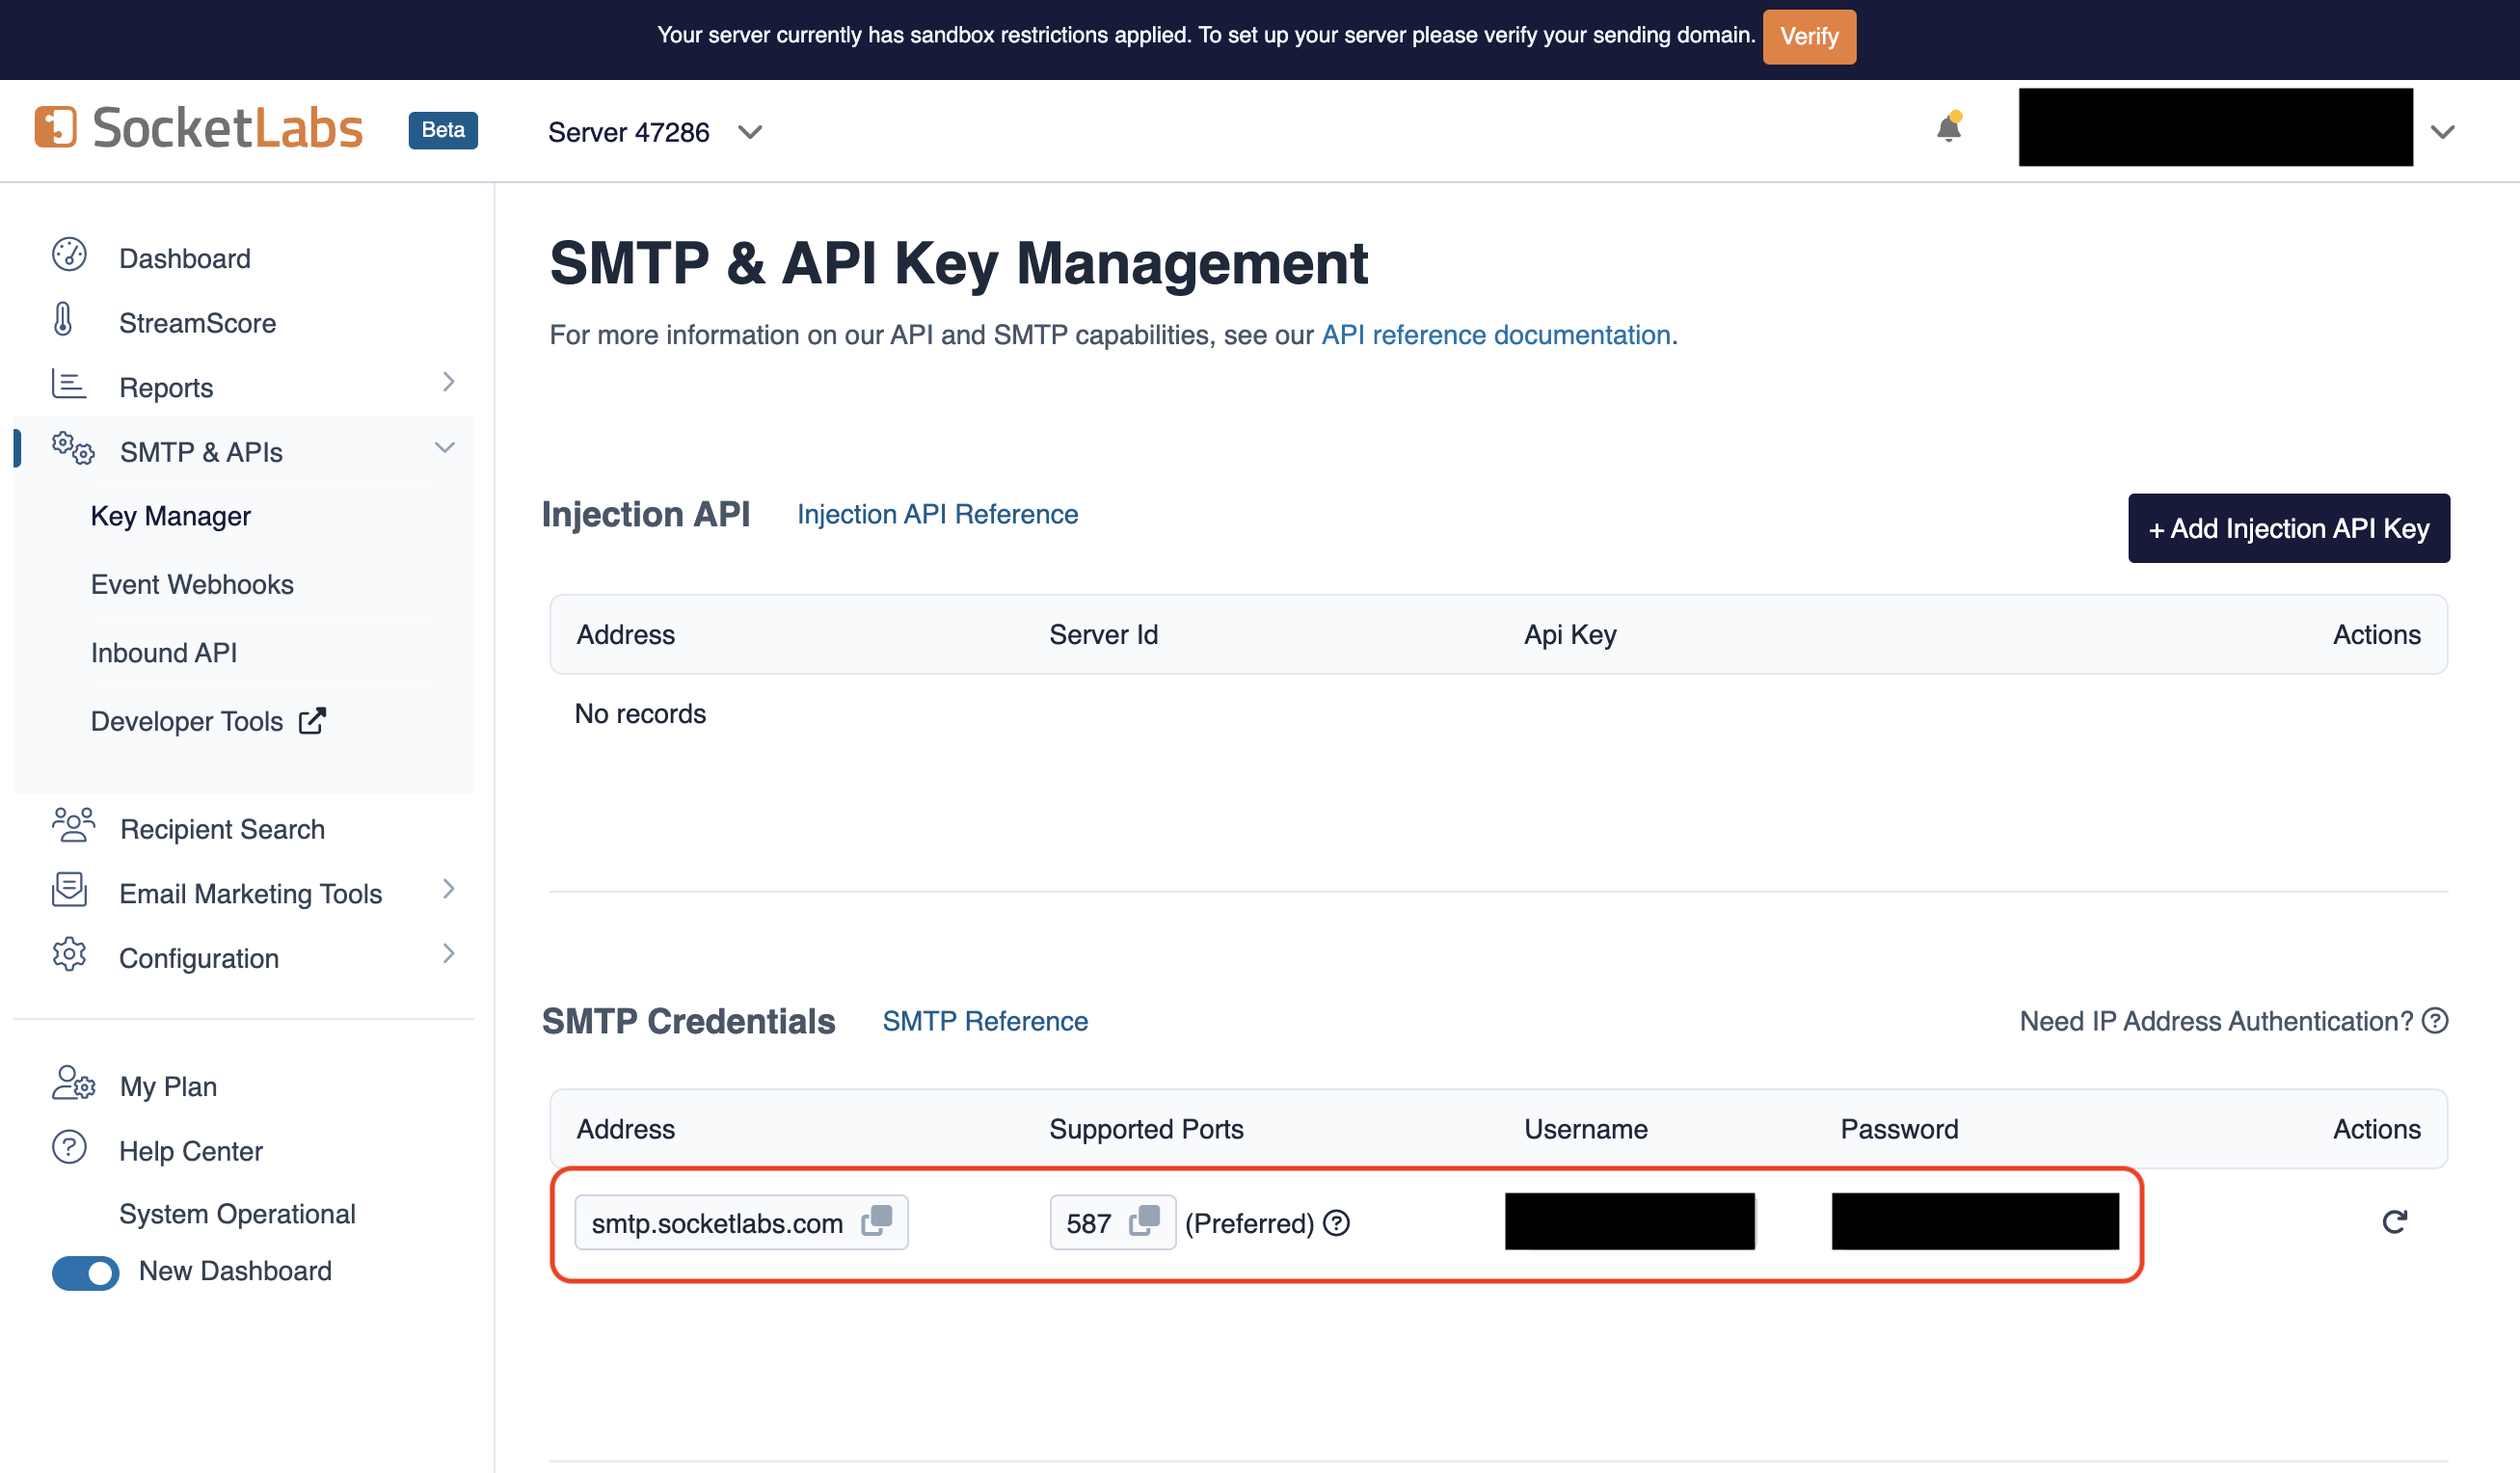
3. With your SocketLabs SMTP credentials, you can now set up your SMTP environment variables:
```
SMTP_HOST=smtp.socketlabs.com
SMTP_USERNAME=username # obtained from your credentials
SMTP_PASSWORD=password # obtained from your credentials
SMTP_PORT=587
SMTP_FROM_ADDRESS=hey@example.com # your email address being used to send out emails
SMTP_FROM_NAME=Infisical
```
{" "}
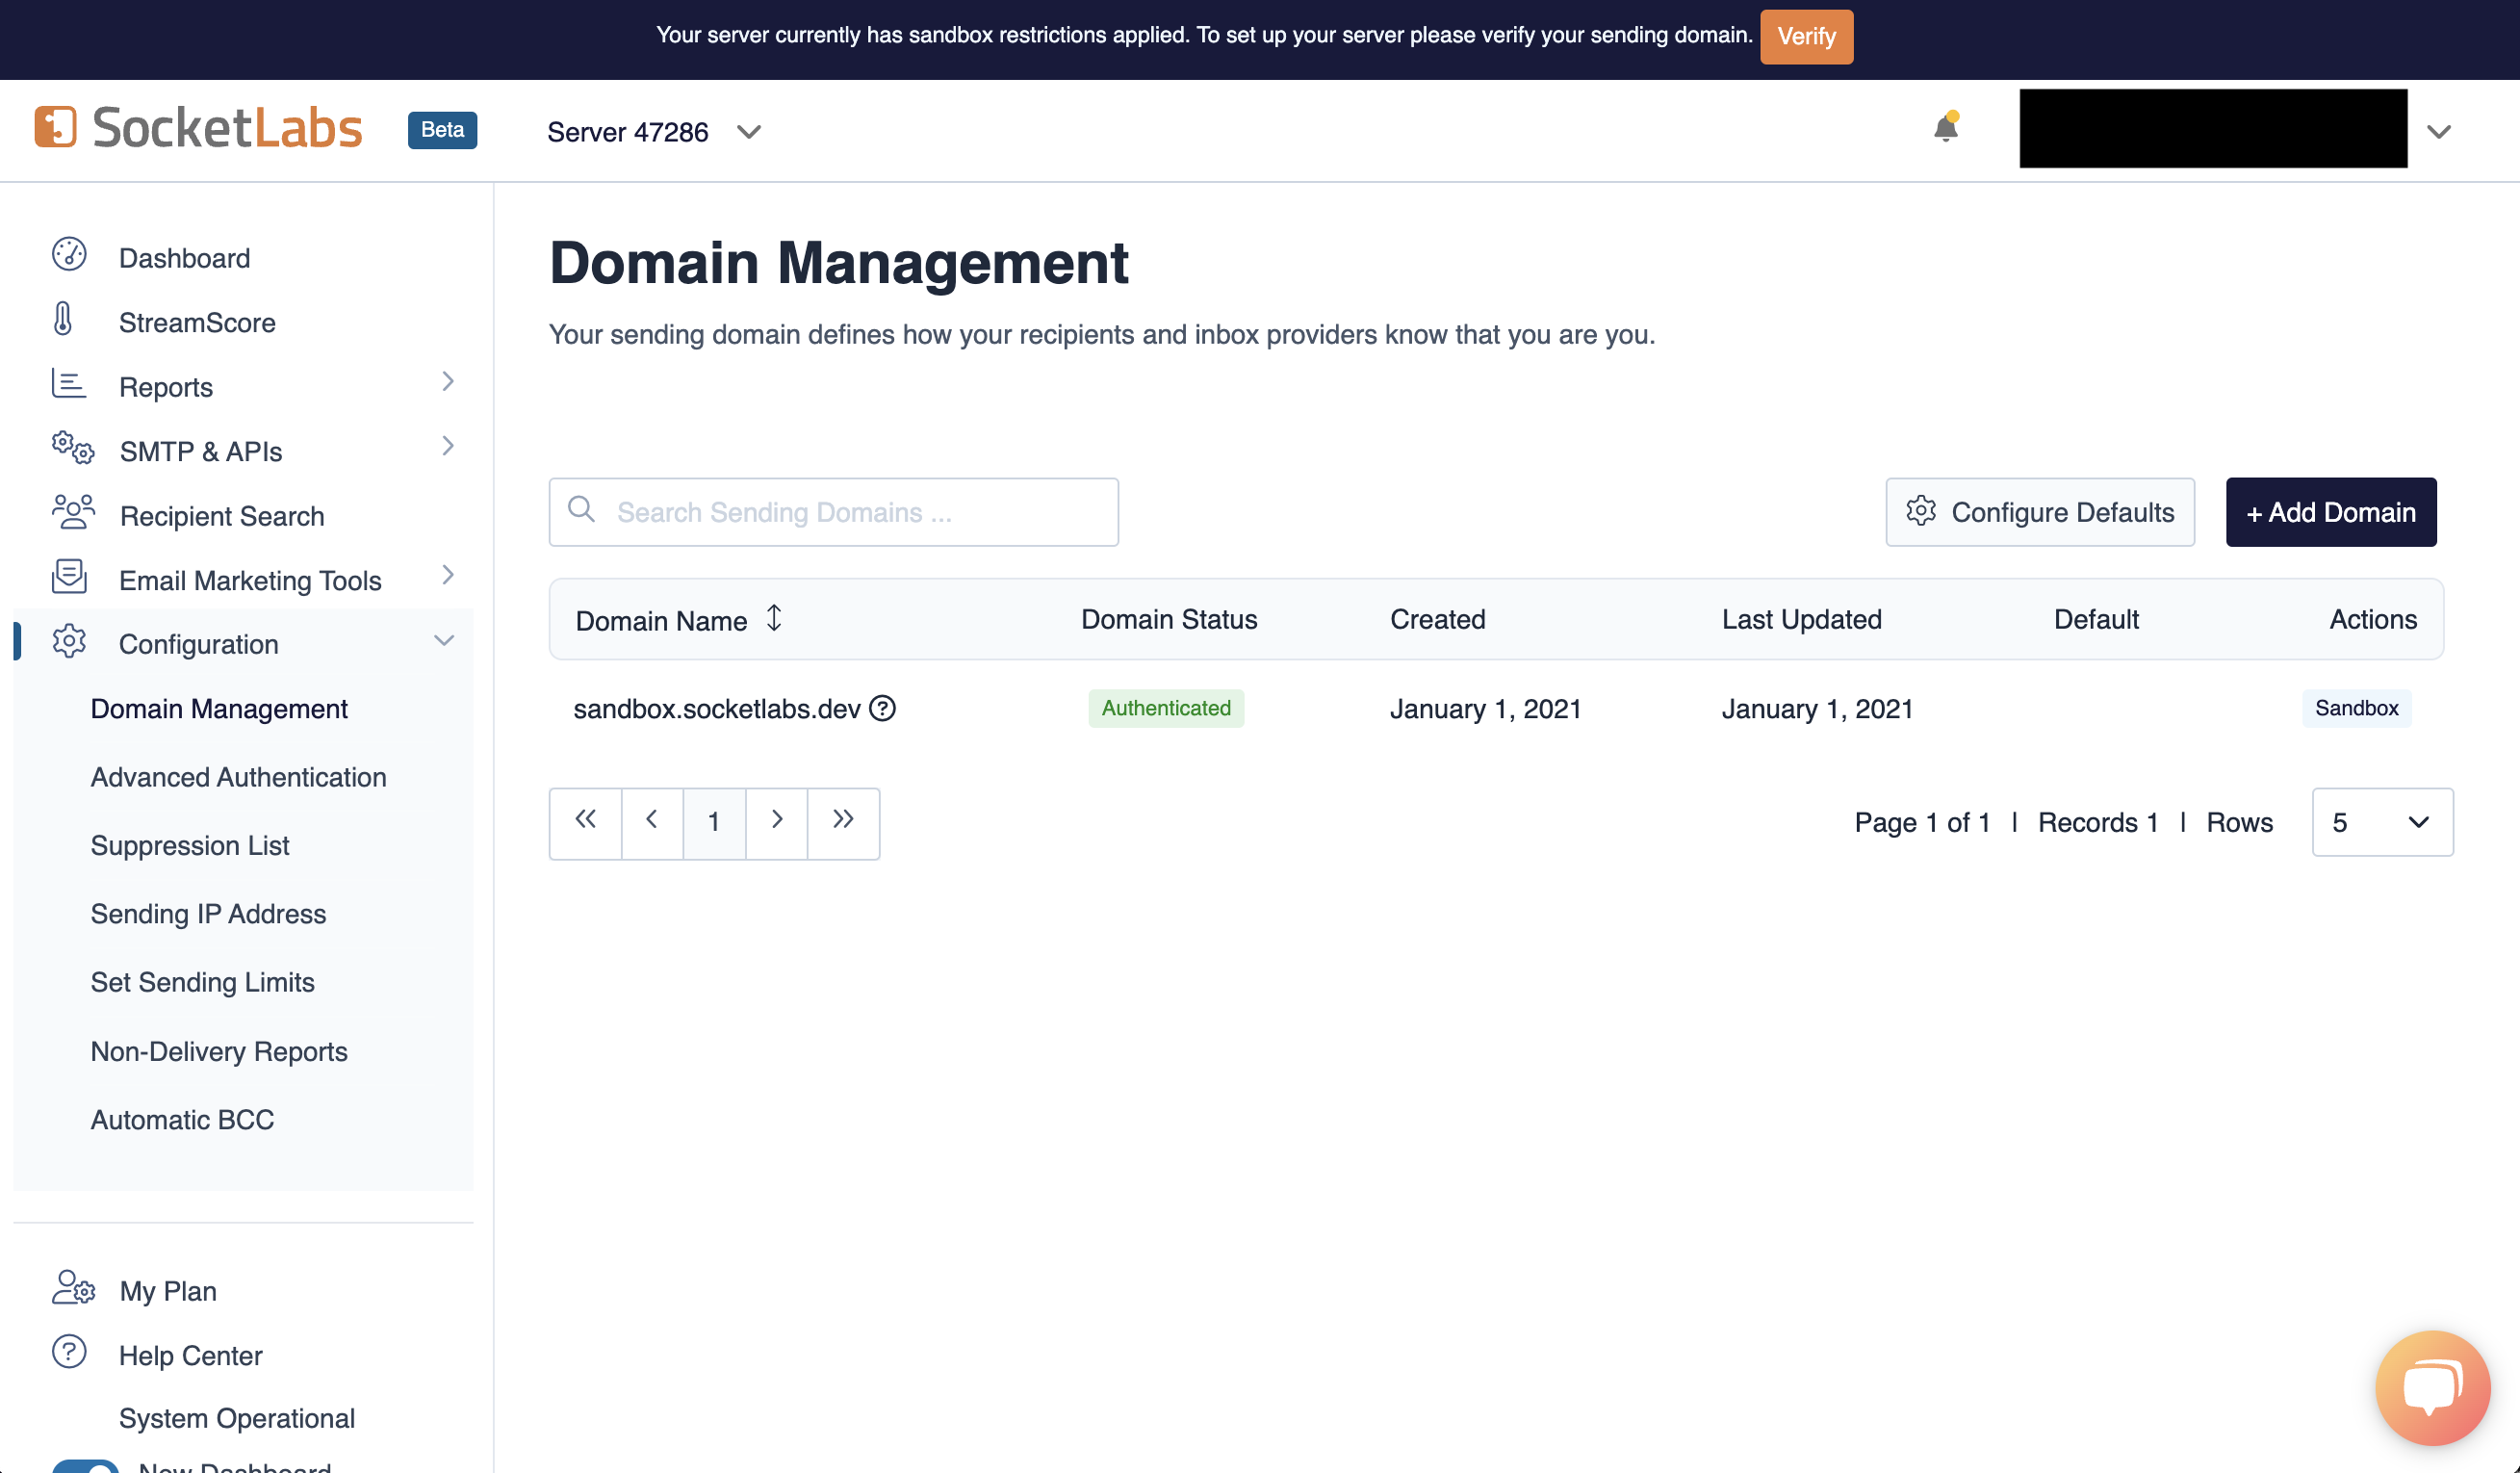
The `SMTP_FROM_ADDRESS` environment variable should be an email for an
authenticated domain under Configuration > Domain Management in SocketLabs.
For example, if you're using SocketLabs in sandbox mode, then you may use an
email like `team@sandbox.socketlabs.dev`.
Remember that you will need to restart Infisical for this to work properly.
1. Create an account on [Resend](https://resend.com).
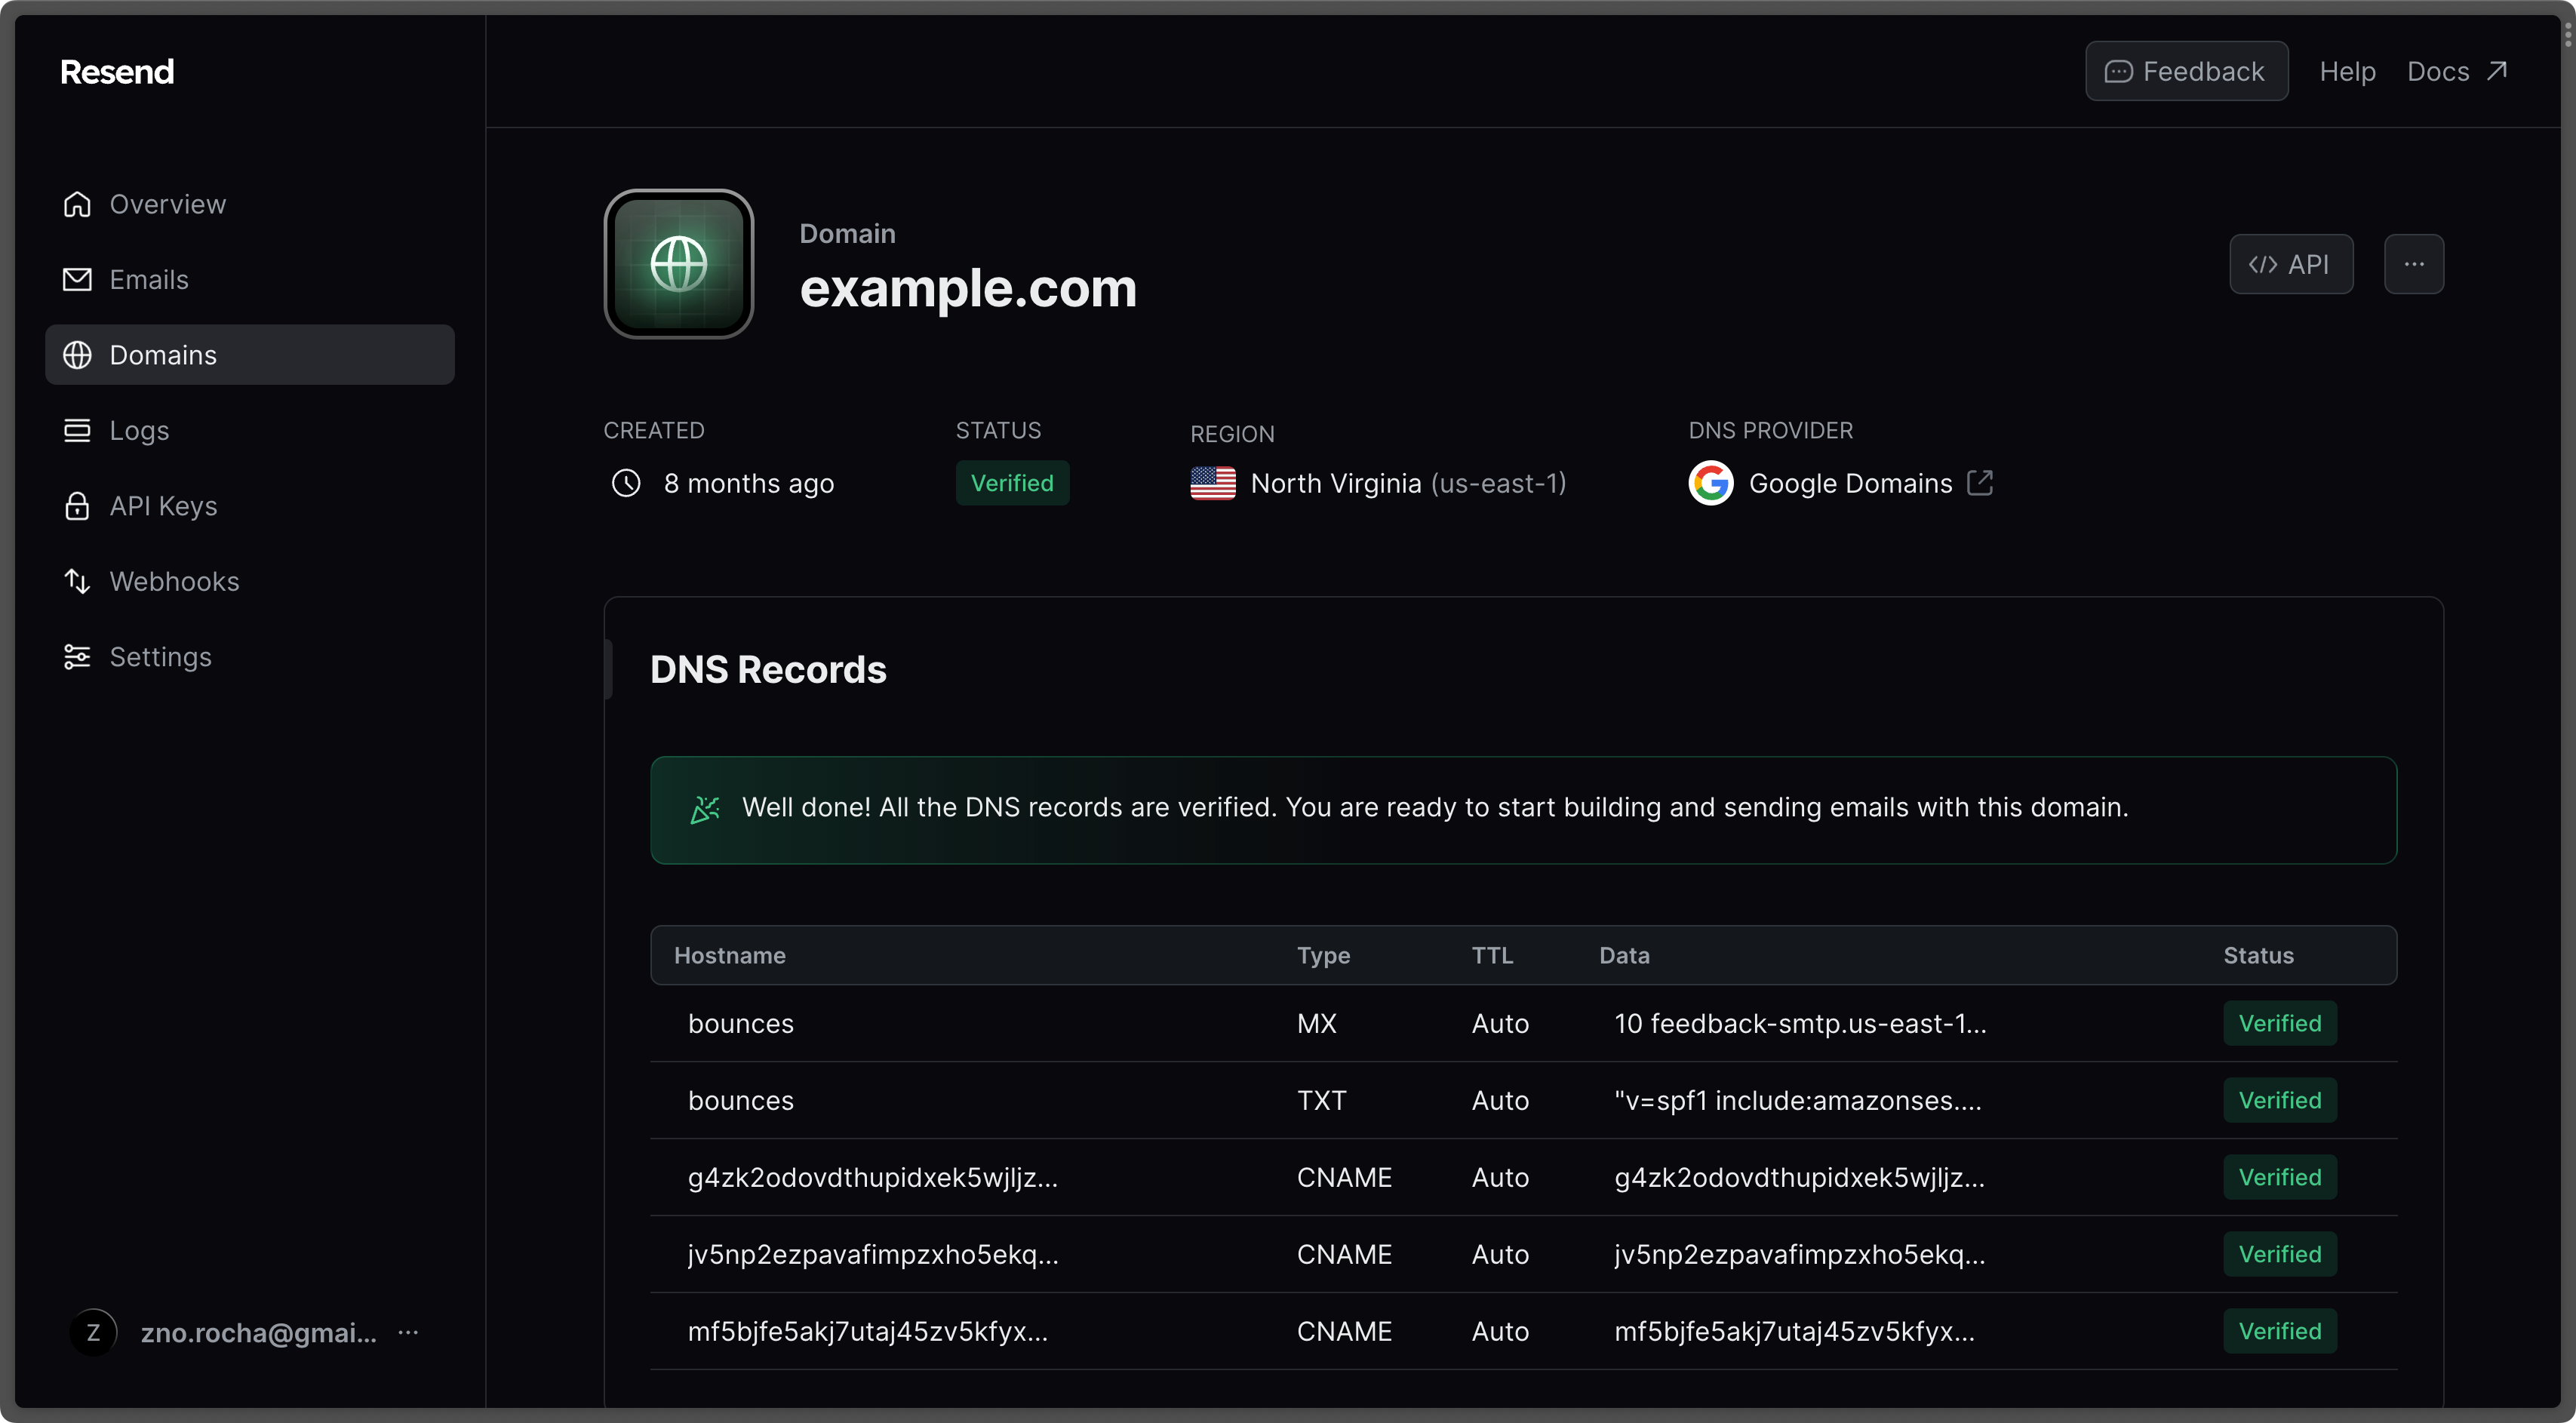
2. Add a [Domain](https://resend.com/domains).
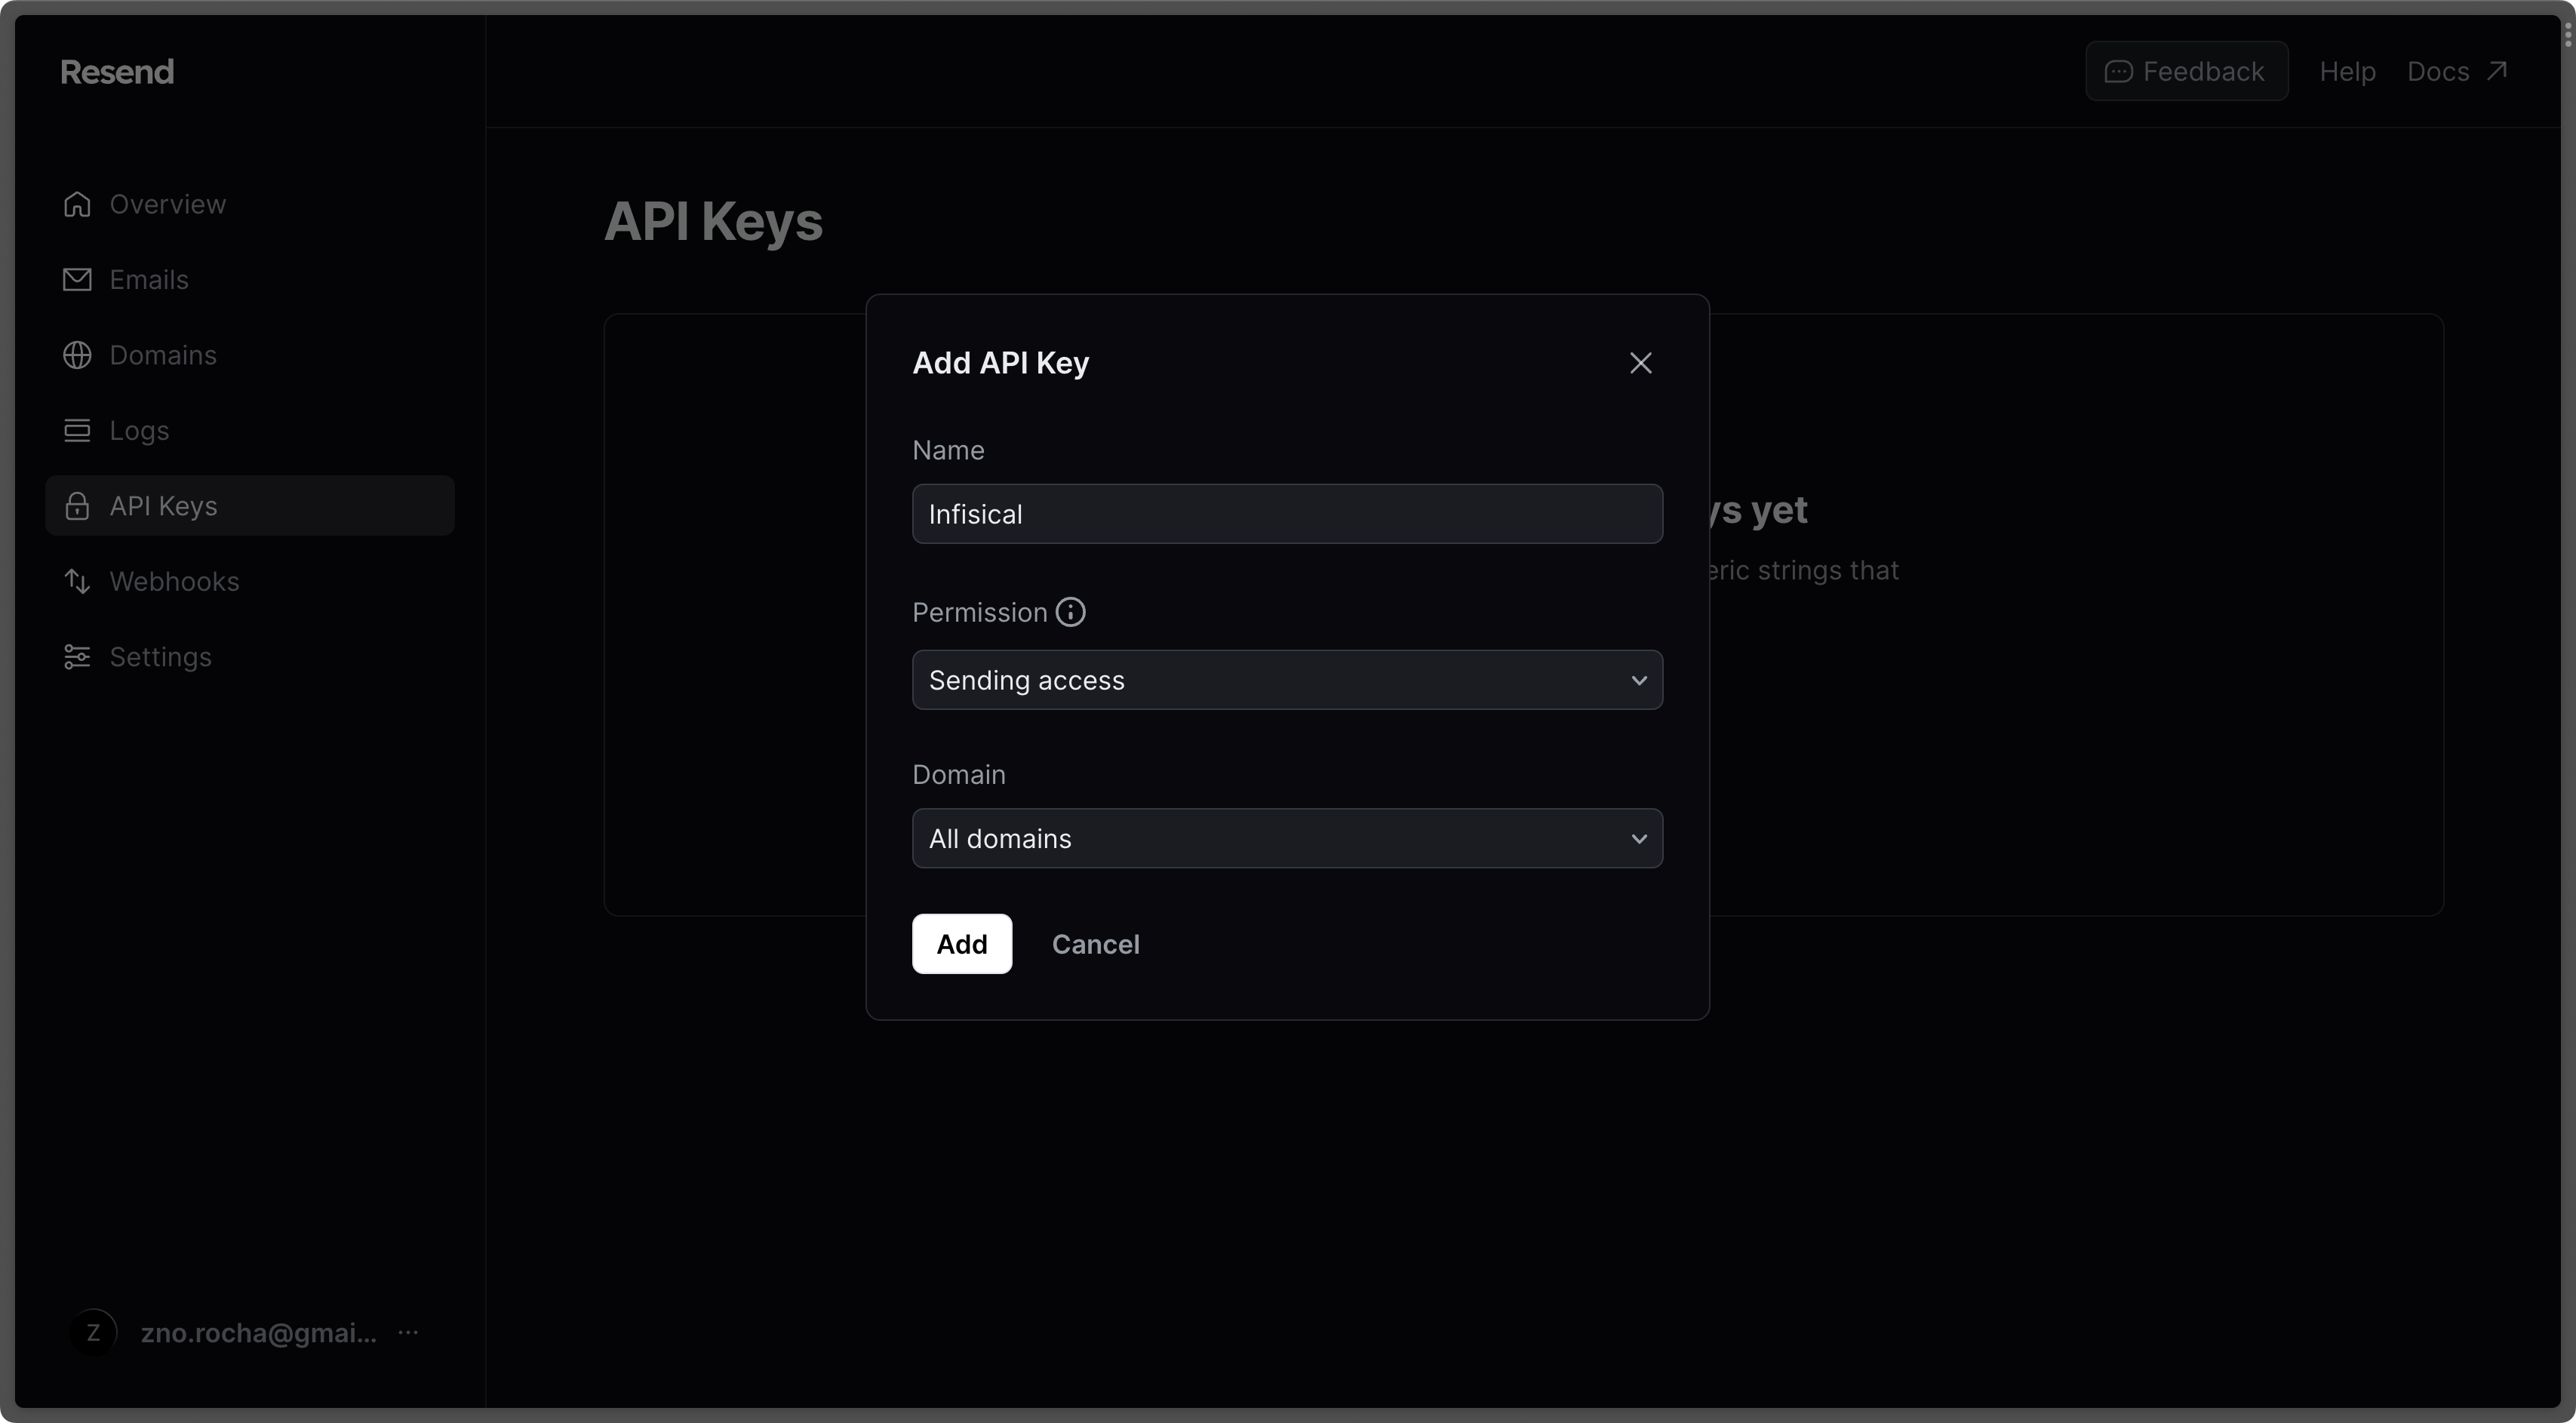
3. Create an [API Key](https://resend.com/api-keys).
4. Go to the [SMTP page](https://resend.com/settings/smtp) and copy the values.

5. With the API Key, you can now set your SMTP environment variables variables:
```
SMTP_HOST=smtp.resend.com
SMTP_USERNAME=resend
SMTP_PASSWORD=YOUR_API_KEY
SMTP_PORT=587
SMTP_FROM_ADDRESS=hey@example.com # your email address being used to send out emails
SMTP_FROM_NAME=Infisical
```
Remember that you will need to restart Infisical for this to work properly.
Create an account and enable "less secure app access" in Gmail Account Settings > Security. This will allow
applications like Infisical to authenticate with Gmail via your username and password.

With your Gmail username and password, you can set your SMTP environment variables:
```
SMTP_HOST=smtp.gmail.com
SMTP_USERNAME=hey@gmail.com # your email
SMTP_PASSWORD=password # your password
SMTP_PORT=587
SMTP_FROM_ADDRESS=hey@gmail.com
SMTP_FROM_NAME=Infisical
```
As per the [notice](https://support.google.com/accounts/answer/6010255?hl=en) by Google, you should note that using Gmail credentials for SMTP configuration
will only work for Google Workspace or Google Cloud Identity customers as of May 30, 2022.
Put differently, the SMTP configuration is only possible with business (not personal) Gmail credentials.
1. Create an account and configure [Office365](https://www.office.com/) to send emails.
2. With your login credentials, you can now set up your SMTP environment variables:
```
SMTP_HOST=smtp.office365.com
SMTP_USERNAME=username@yourdomain.com # your username
SMTP_PASSWORD=password # your password
SMTP_PORT=587
SMTP_FROM_ADDRESS=username@yourdomain.com
SMTP_FROM_NAME=Infisical
```
1. Create an account and configure [Zoho Mail](https://www.zoho.com/mail/) to send emails.
2. With your email credentials, you can now set up your SMTP environment variables:
```
SMTP_HOST=smtp.zoho.com
SMTP_USERNAME=username # your email
SMTP_PASSWORD=password # your password
SMTP_PORT=587
SMTP_FROM_ADDRESS=hey@example.com # your personal Zoho email or domain-based email linked to Zoho Mail
SMTP_FROM_NAME=Infisical
```
{" "}
You can use either your personal Zoho email address like `you@zohomail.com` or
a domain-based email address like `you@yourdomain.com`. If using a
domain-based email address, then please make sure that you've configured and
verified it with Zoho Mail.
Remember that you will need to restart Infisical for this to work properly.
1. Create an account and configure [SMTP2Go](https://www.smtp2go.com/) to send emails.
2. Turn on SMTP authentication
```
SMTP_HOST=mail.smtp2go.com
SMTP_PORT=You can use one of the following ports: 2525, 80, 25, 8025, or 587
SMTP_USERNAME=username #Your SMTP2GO account's SMTP username
SMTP_PASSWORD=password #Your SMTP2GO account's SMTP password
SMTP_FROM_ADDRESS=hey@example.com # your email address being used to send out emails
SMTP_FROM_NAME=Infisical
```
{" "}
Optional (for TLS/SSL):
TLS: Available on the same ports (2525, 80, 25, 8025, or 587)
SSL: Available on ports 465, 8465, and 443
## Authentication
By default, users can only login via email/password based login method.
To login into Infisical with OAuth providers such as Google, configure the associated variables.
When set, all visits to the Infisical login page will automatically redirect users of your Infisical instance to the SAML identity provider associated with the specified organization slug.
Follow detailed guide to configure [Google SSO](/documentation/platform/sso/google)
OAuth2 client ID for Google login
OAuth2 client secret for Google login
Follow detailed guide to configure [GitHub SSO](/documentation/platform/sso/github)
OAuth2 client ID for GitHub login
OAuth2 client secret for GitHub login
Follow detailed guide to configure [GitLab SSO](/documentation/platform/sso/gitlab)
OAuth2 client ID for GitLab login
OAuth2 client secret for GitLab login
URL of your self-hosted instance of GitLab where the OAuth application is registered
Requires enterprise license. Please contact team@infisical.com to get more
information.
Requires enterprise license. Please contact team@infisical.com to get more
information.
Requires enterprise license. Please contact team@infisical.com to get more
information.
## App Connections
You can configure third-party app connections for re-use across Infisical Projects.
The AWS IAM User access key ID for assuming roles
The AWS IAM User secret key for assuming roles
The ID of the GitHub App
The slug of the GitHub App
The client ID for the GitHub App
The client secret for the GitHub App
The private key for the GitHub App
The ID of the GitHub Radar App
The slug of the GitHub Radar App
The client ID for the GitHub Radar App
The client secret for the GitHub Radar App
The private key for the GitHub Radar App
The webhook secret configured for payload verification in the GitHub Radar App
The OAuth2 client ID for GitHub OAuth Connection
The OAuth2 client secret for GitHub OAuth Connection
The Application ID of your GitLab OAuth application.
The Secret of your GitLab OAuth application.
The Application ID of your Heroku OAuth application.
The Secret of your Heroku OAuth application.
## Secret Scanning
The App ID of your GitHub App.
{" "}
The slug of your GitHub App.
{" "}
A private key for your GitHub App.
The webhook secret of your GitHub App.
## Observability
You can configure Infisical to collect and expose telemetry data for analytics and monitoring.
Whether or not to collect and expose telemetry data.
Supported types are `prometheus` and `otlp`.
If export type is set to `prometheus`, metric data will be exposed in port 9464 in the `/metrics` path.
If export type is set to `otlp`, you will have to configure a value for `OTEL_EXPORT_OTLP_ENDPOINT`.
Where telemetry data would be pushed to for collection. This is only
applicable when `OTEL_EXPORT_TYPE` is set to `otlp`.
The username for authenticating with the telemetry collector.
The password for authenticating with the telemetry collector.
## Identity Auth Method
The TLS header used to propagate the client certificate from the load balancer
to the server.
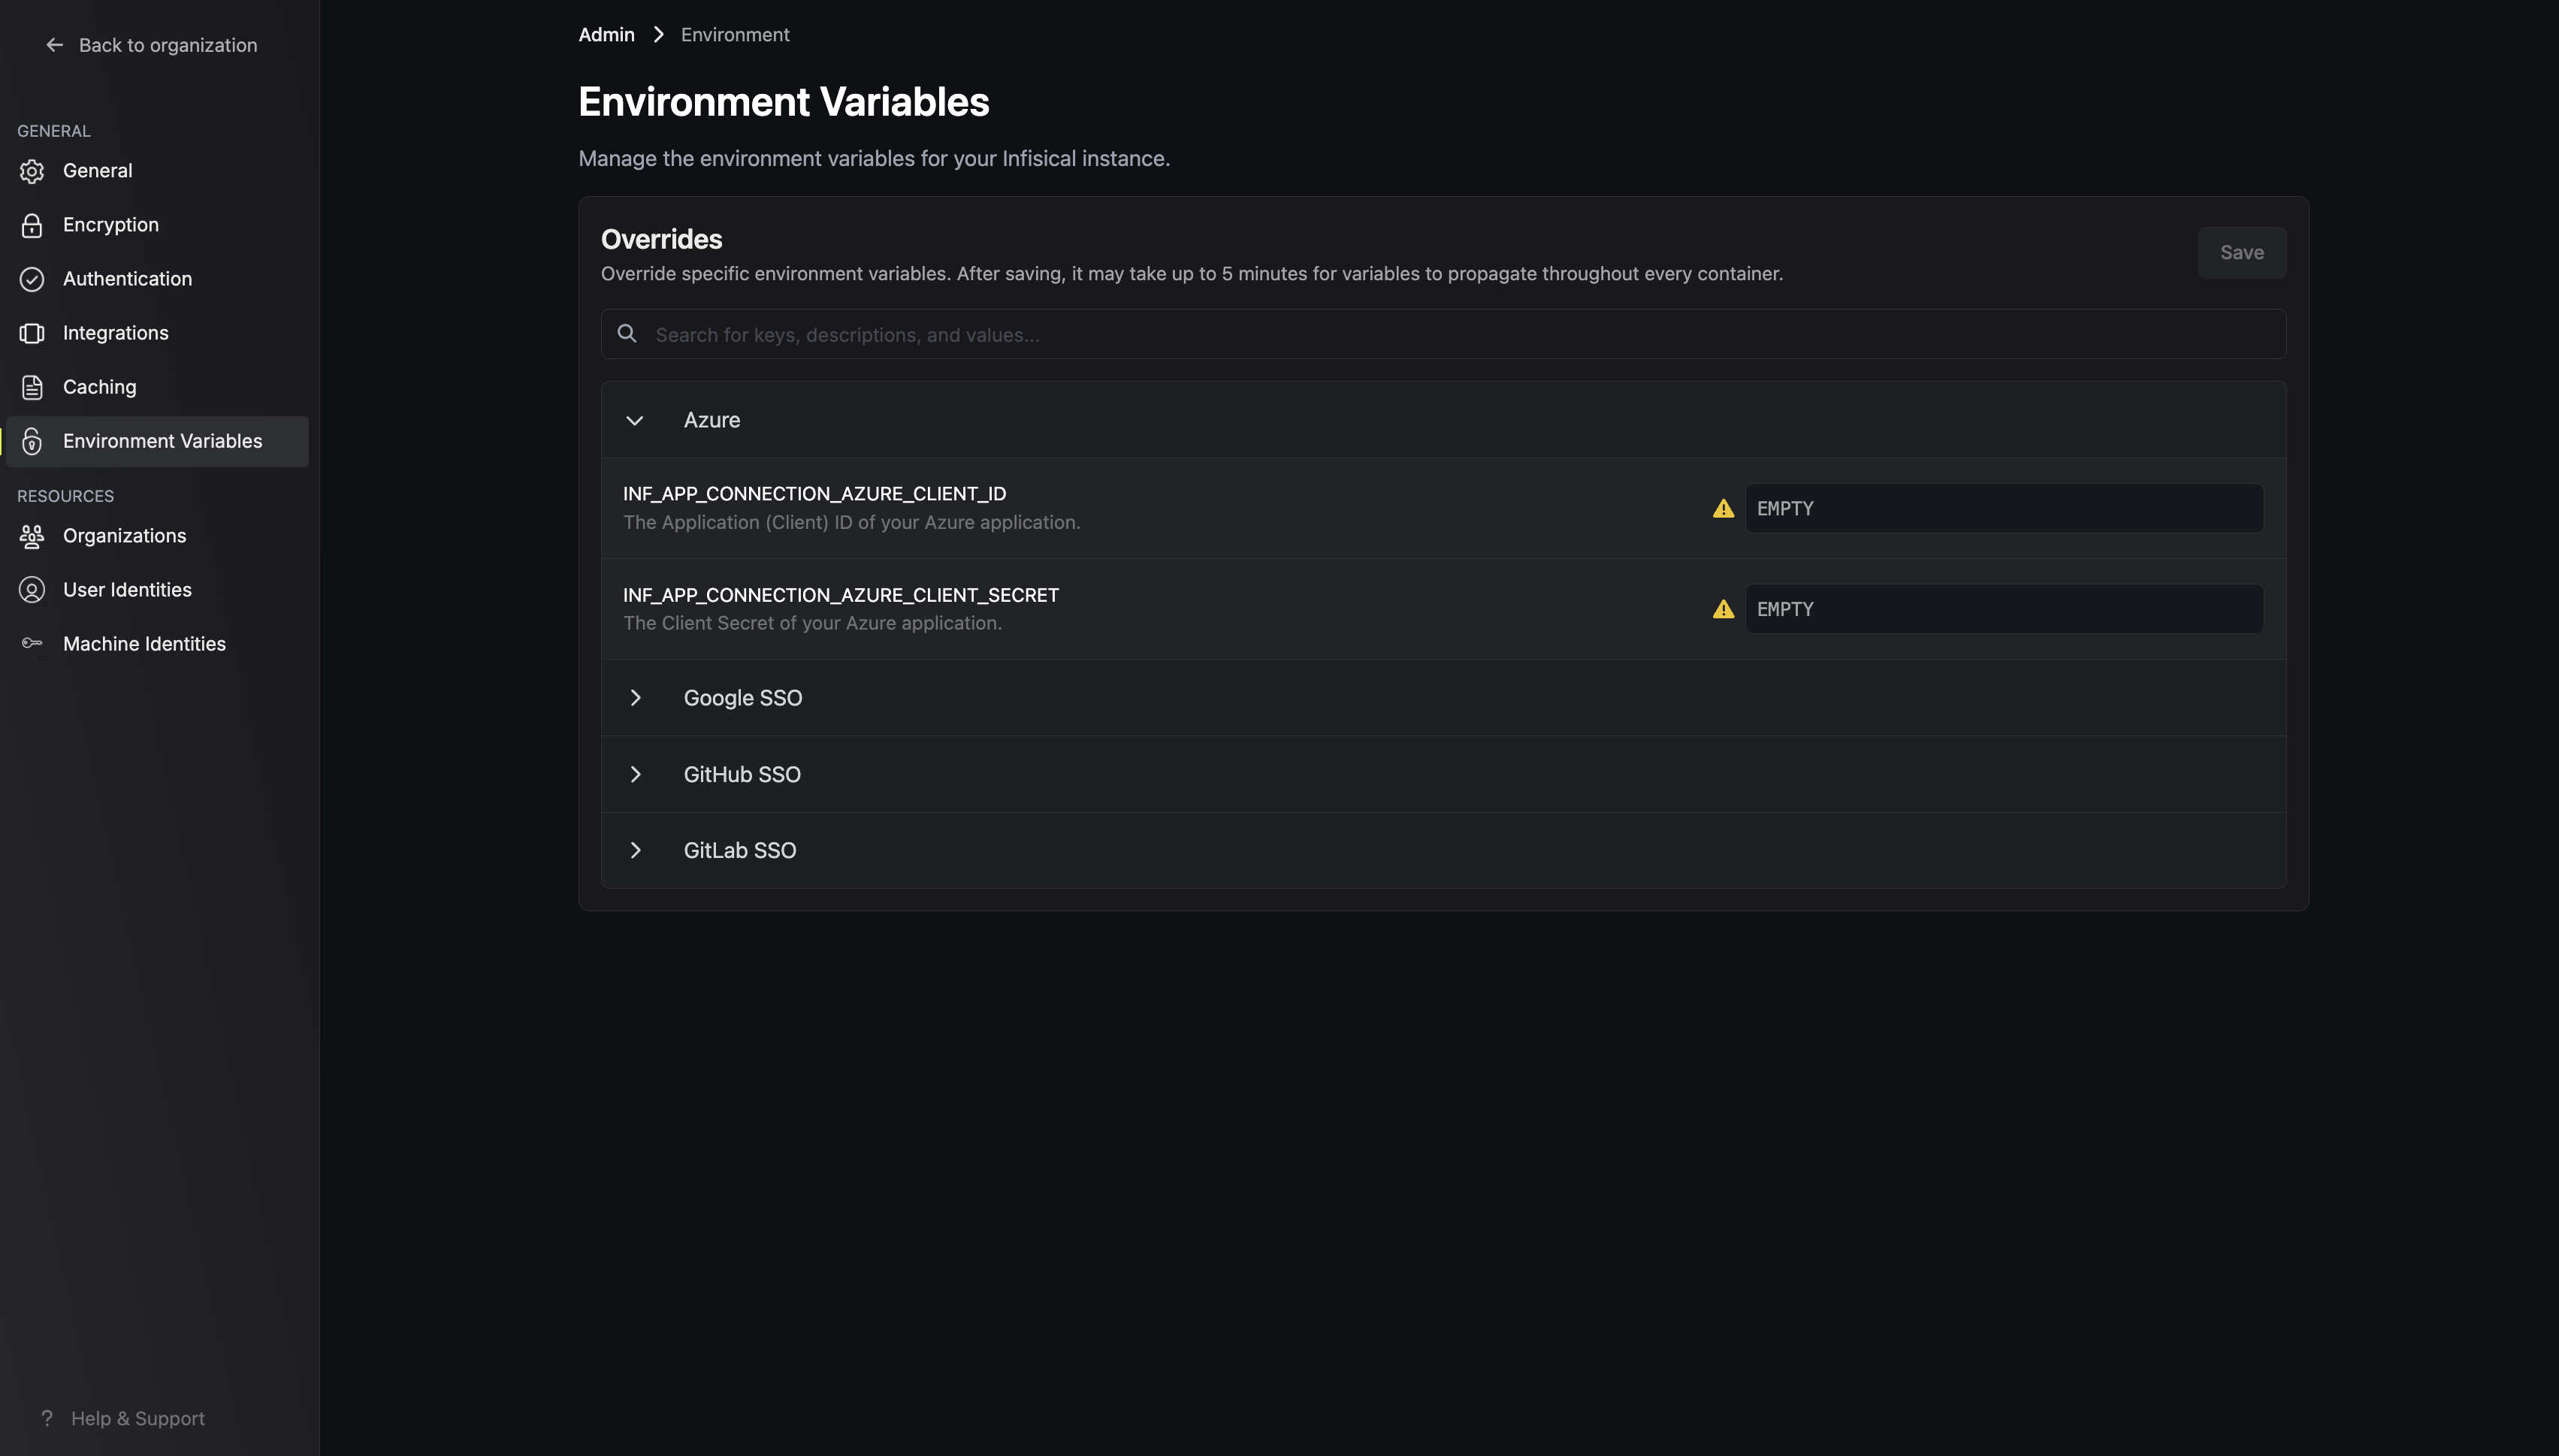
## Environment Variable Overrides
If you can't directly access and modify environment variables, you can update them using the [Server Admin Console](/documentation/platform/admin-panel/server-admin).